Invoices
Invoices are the heart of weBiller. This page covers the whole journey: creating an invoice, sending it, and tracking payment.
The invoices list
Open Invoices from the sidebar to see everything you’ve billed.
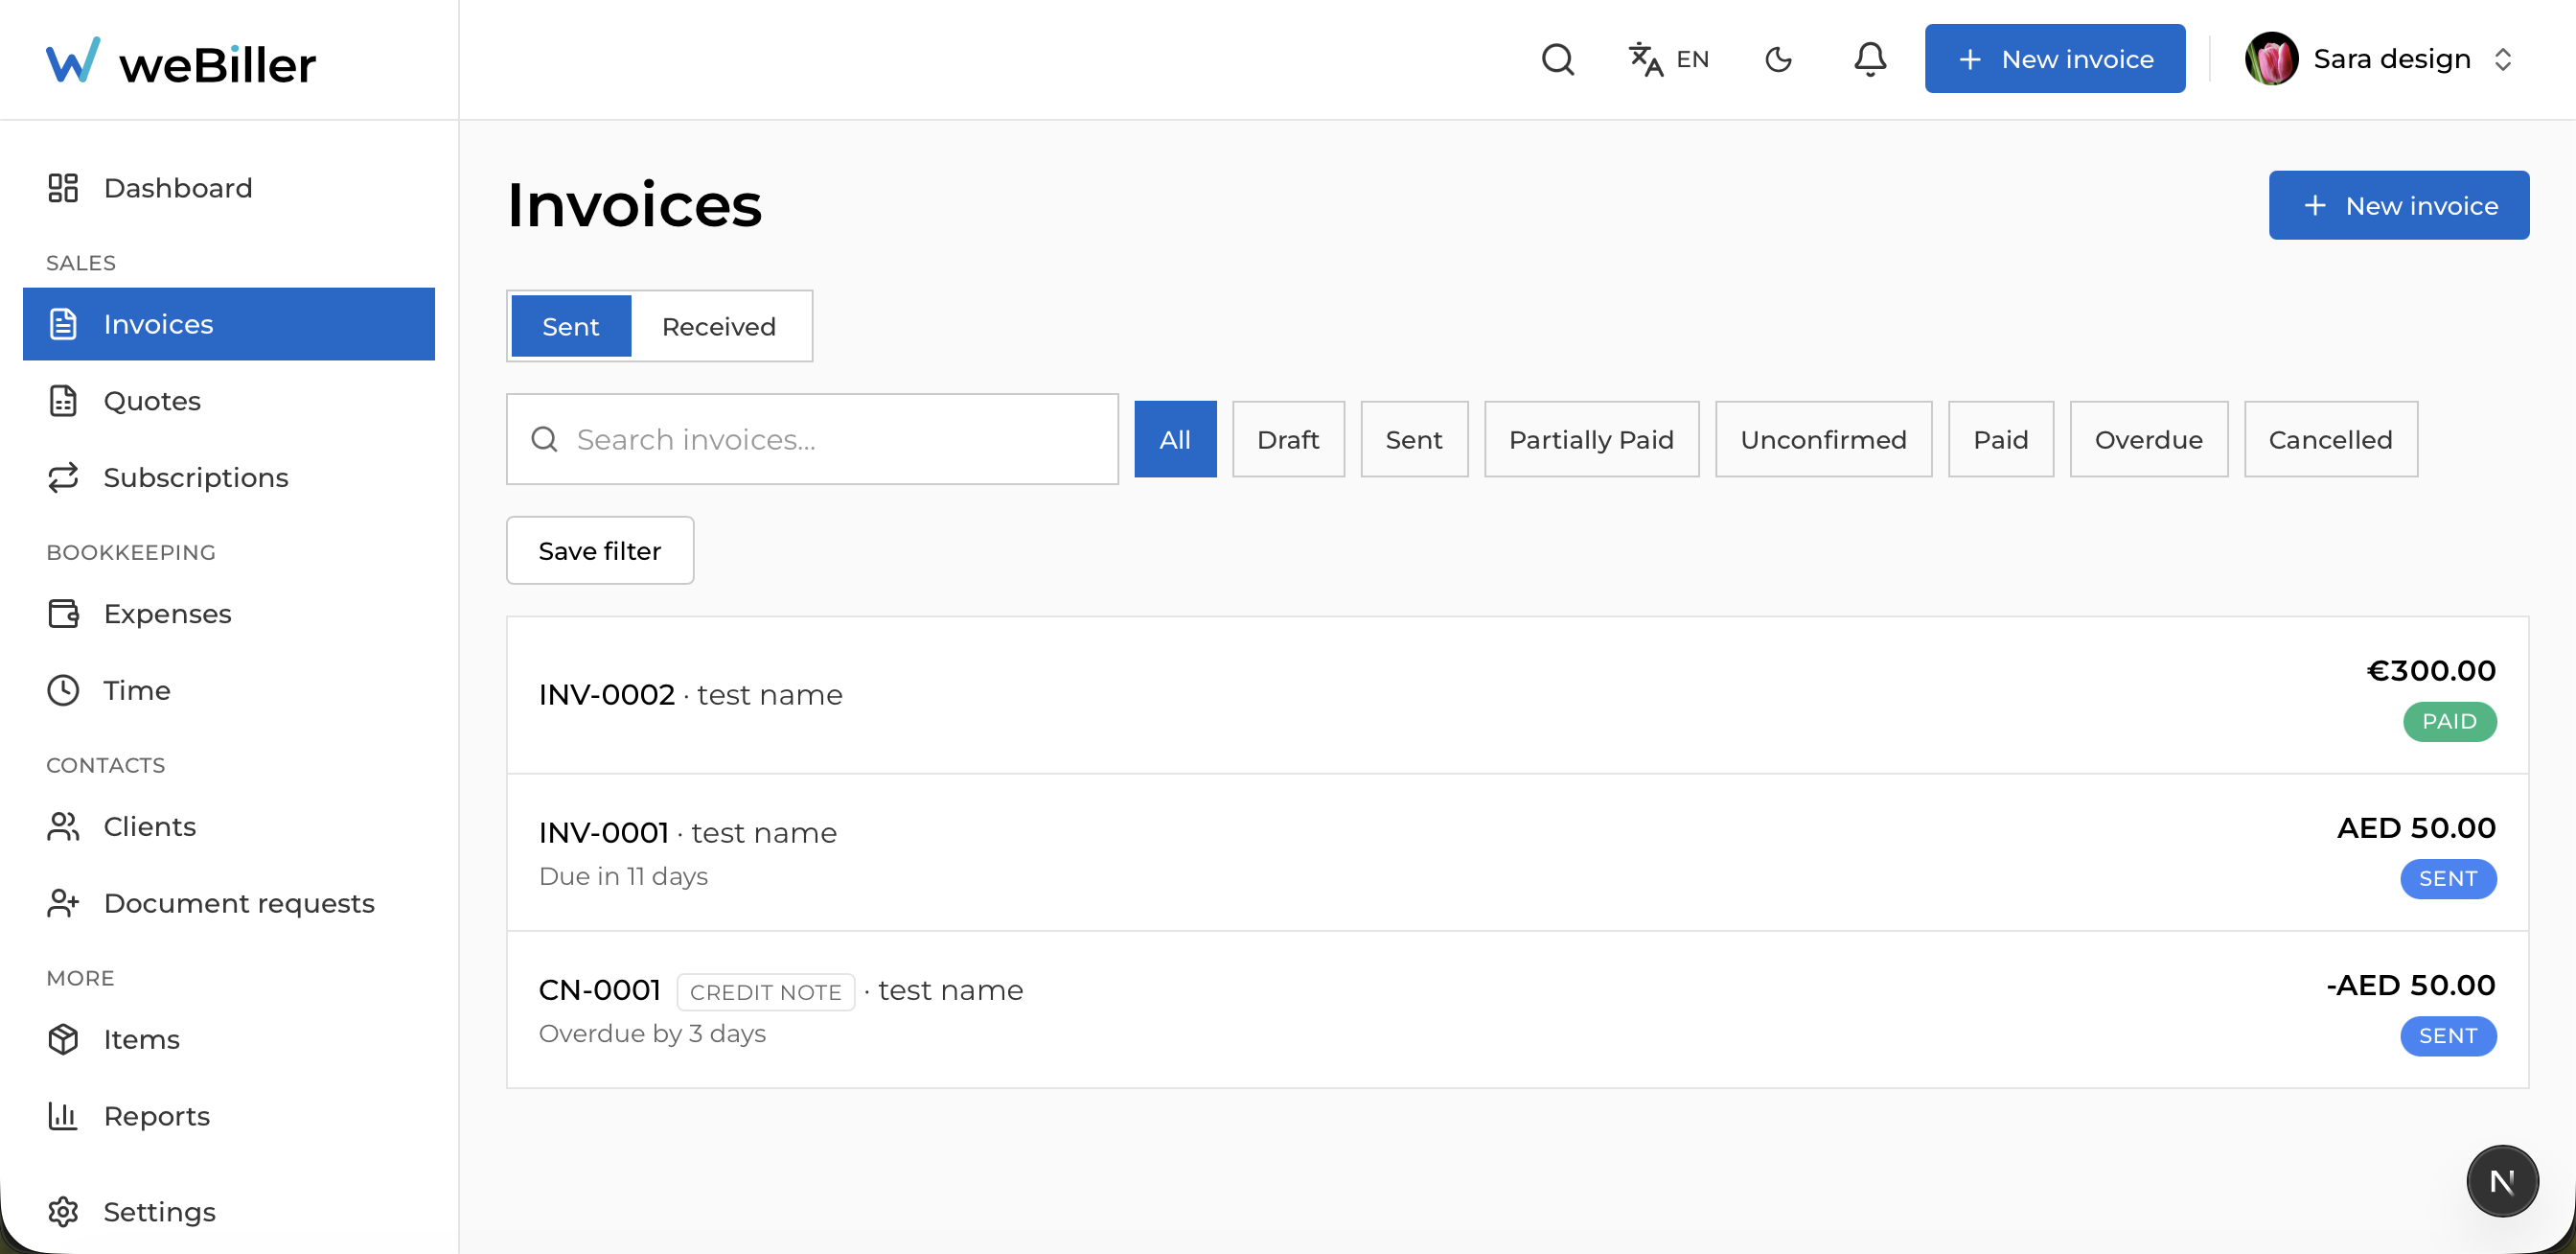
- Sent / Received: switch between invoices you sent and invoices other weBiller users sent you. (Received invoices are covered in Getting paid.)
- Search and status chips narrow the list.
- Saved filters: on the Sent tab, save a status + search combination you use often, then reapply it in one click.
- New invoice starts a fresh invoice.
Create an invoice
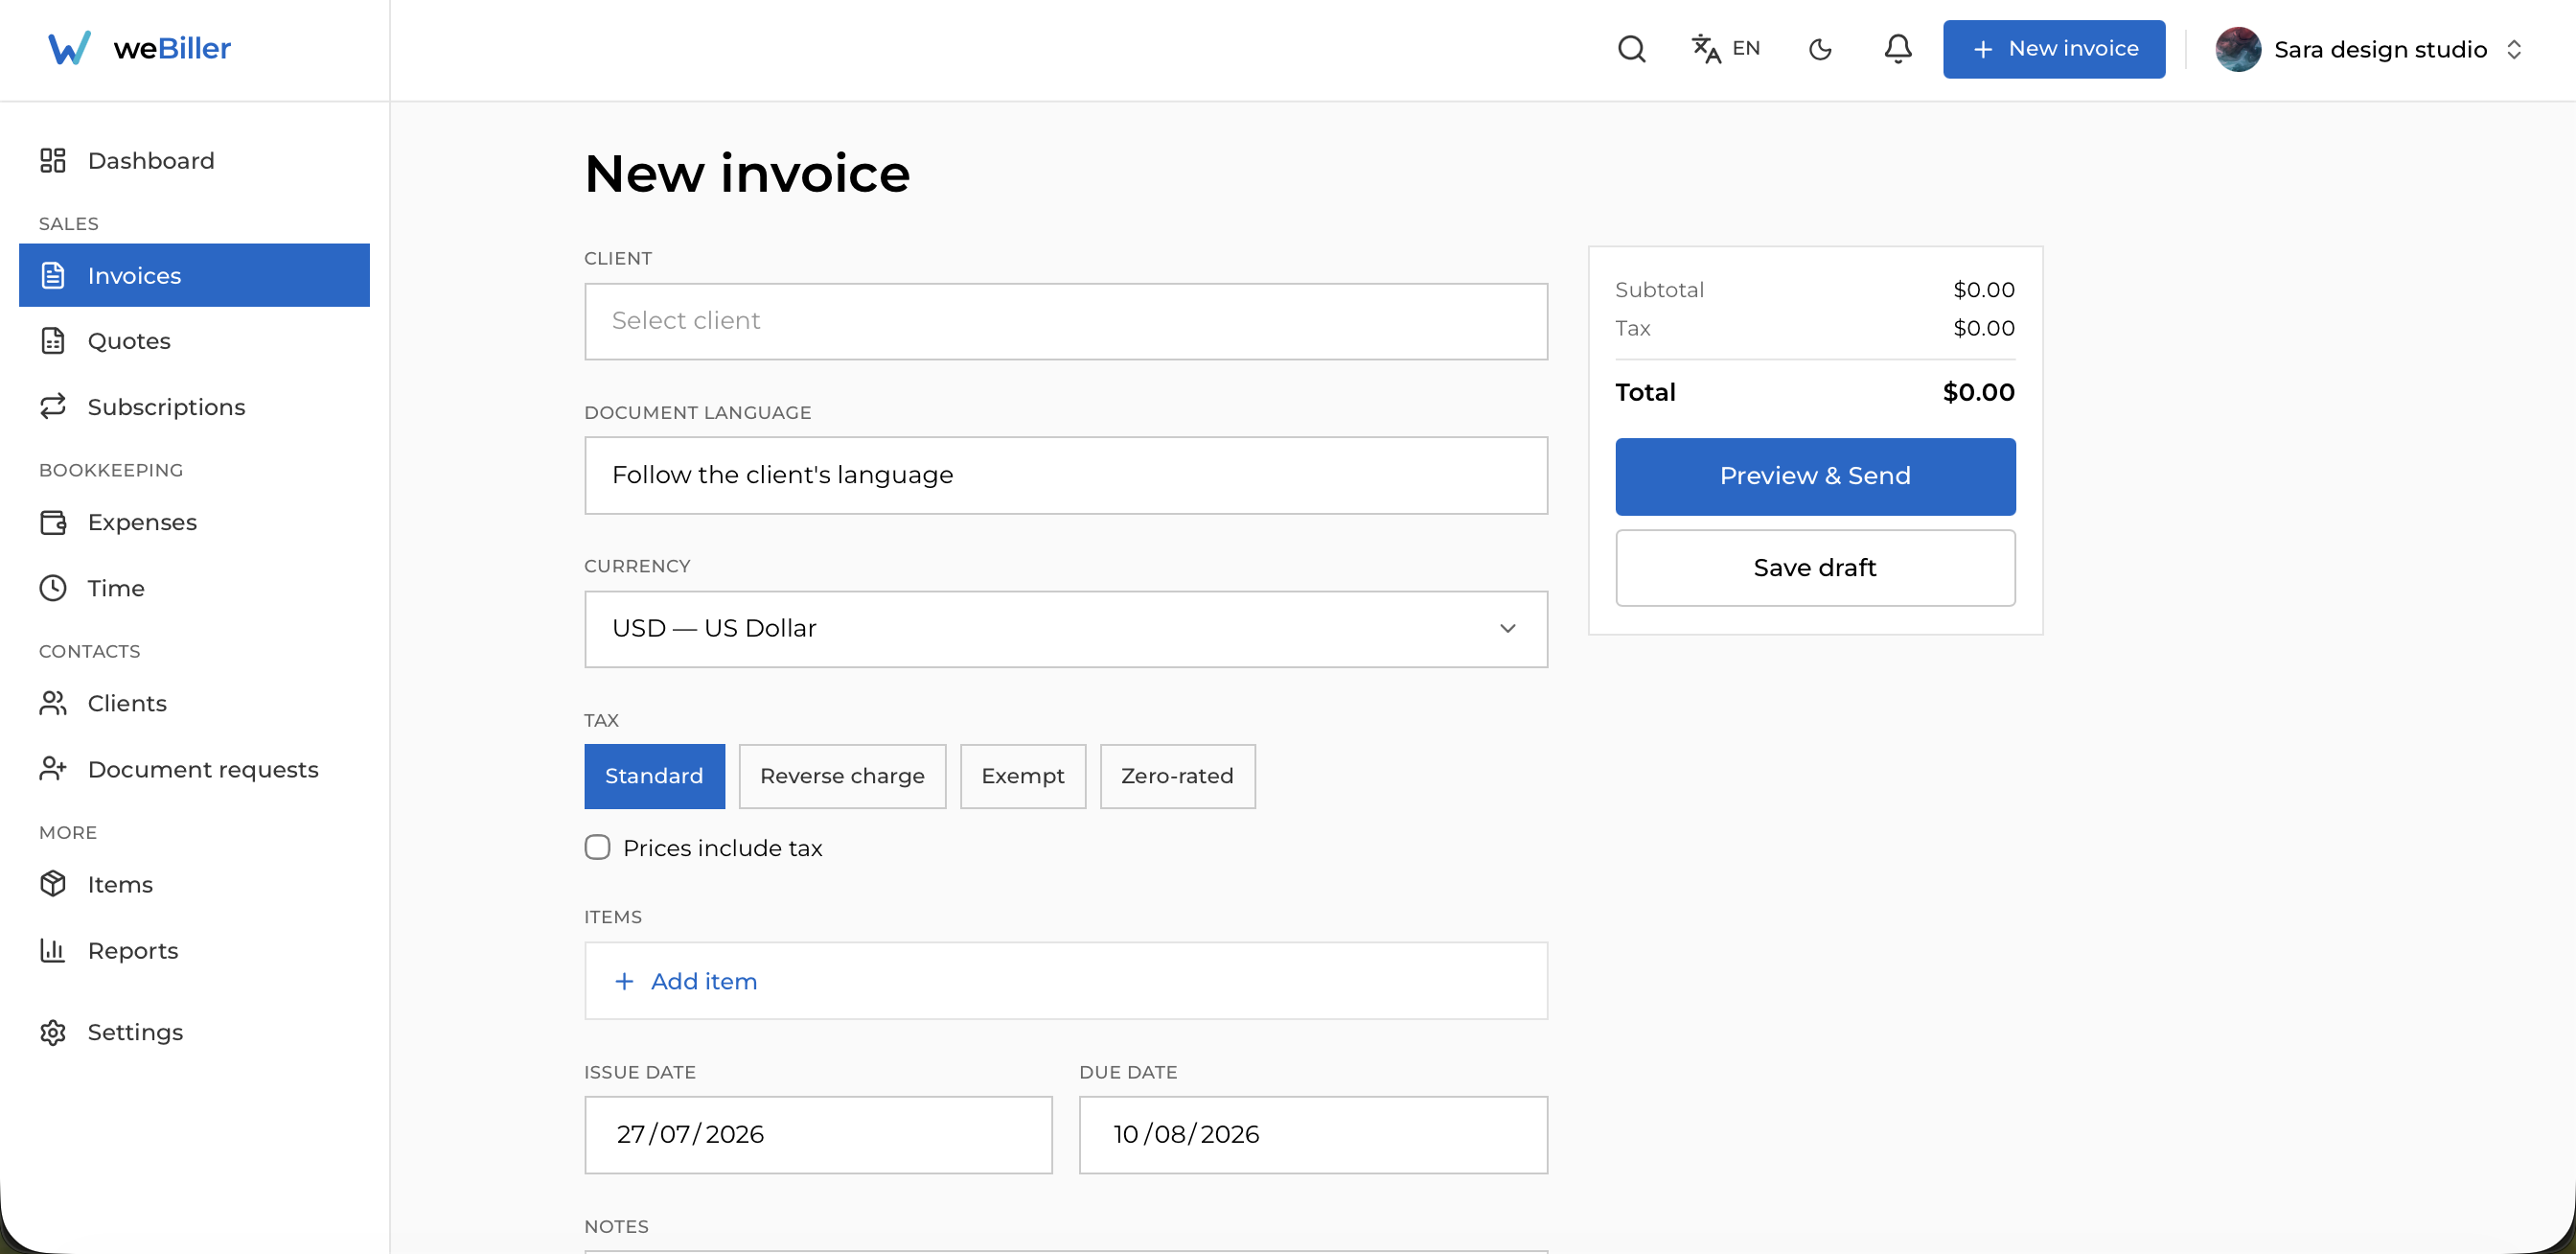
Pick the client
Choose an existing client or add a new one on the spot. (You can also start an invoice pre-filled for a client from that client’s page.)
Confirm the currency
The currency is seeded from your default, then the client’s default. You can change it until you touch a line item; after that it locks so totals stay consistent.
Add line items
Add each product or service: description, quantity, unit, unit price, and tax rate. Pull from your saved Items or type them in freely.
Check the tax scheme
Standard taxes each line at its rate. Pick Reverse charge, Exempt, or Zero-rated to charge no VAT and print the required legal note instead. There’s also a Prices include tax toggle for when your unit prices are already gross. See VAT & tax.
Set the dates
The issue date defaults to today and the due date to 14 days out. Adjust either.
Add notes and payment terms (optional)
Anything the client should see: a thank-you, bank details, or terms.
Save or preview
Use Save draft to keep it as a Draft, or Preview & Send to see the document and send it.
The sticky card at the bottom always shows the live Subtotal, Tax, and Total as you build.
Preview & send
The preview renders the real invoice document your client will see, using your chosen template.
- Download PDF saves a copy.
- Send invoice (on a draft) delivers it and moves the invoice to Sent. How it’s delivered depends on the client; see Getting paid.
The invoice detail page
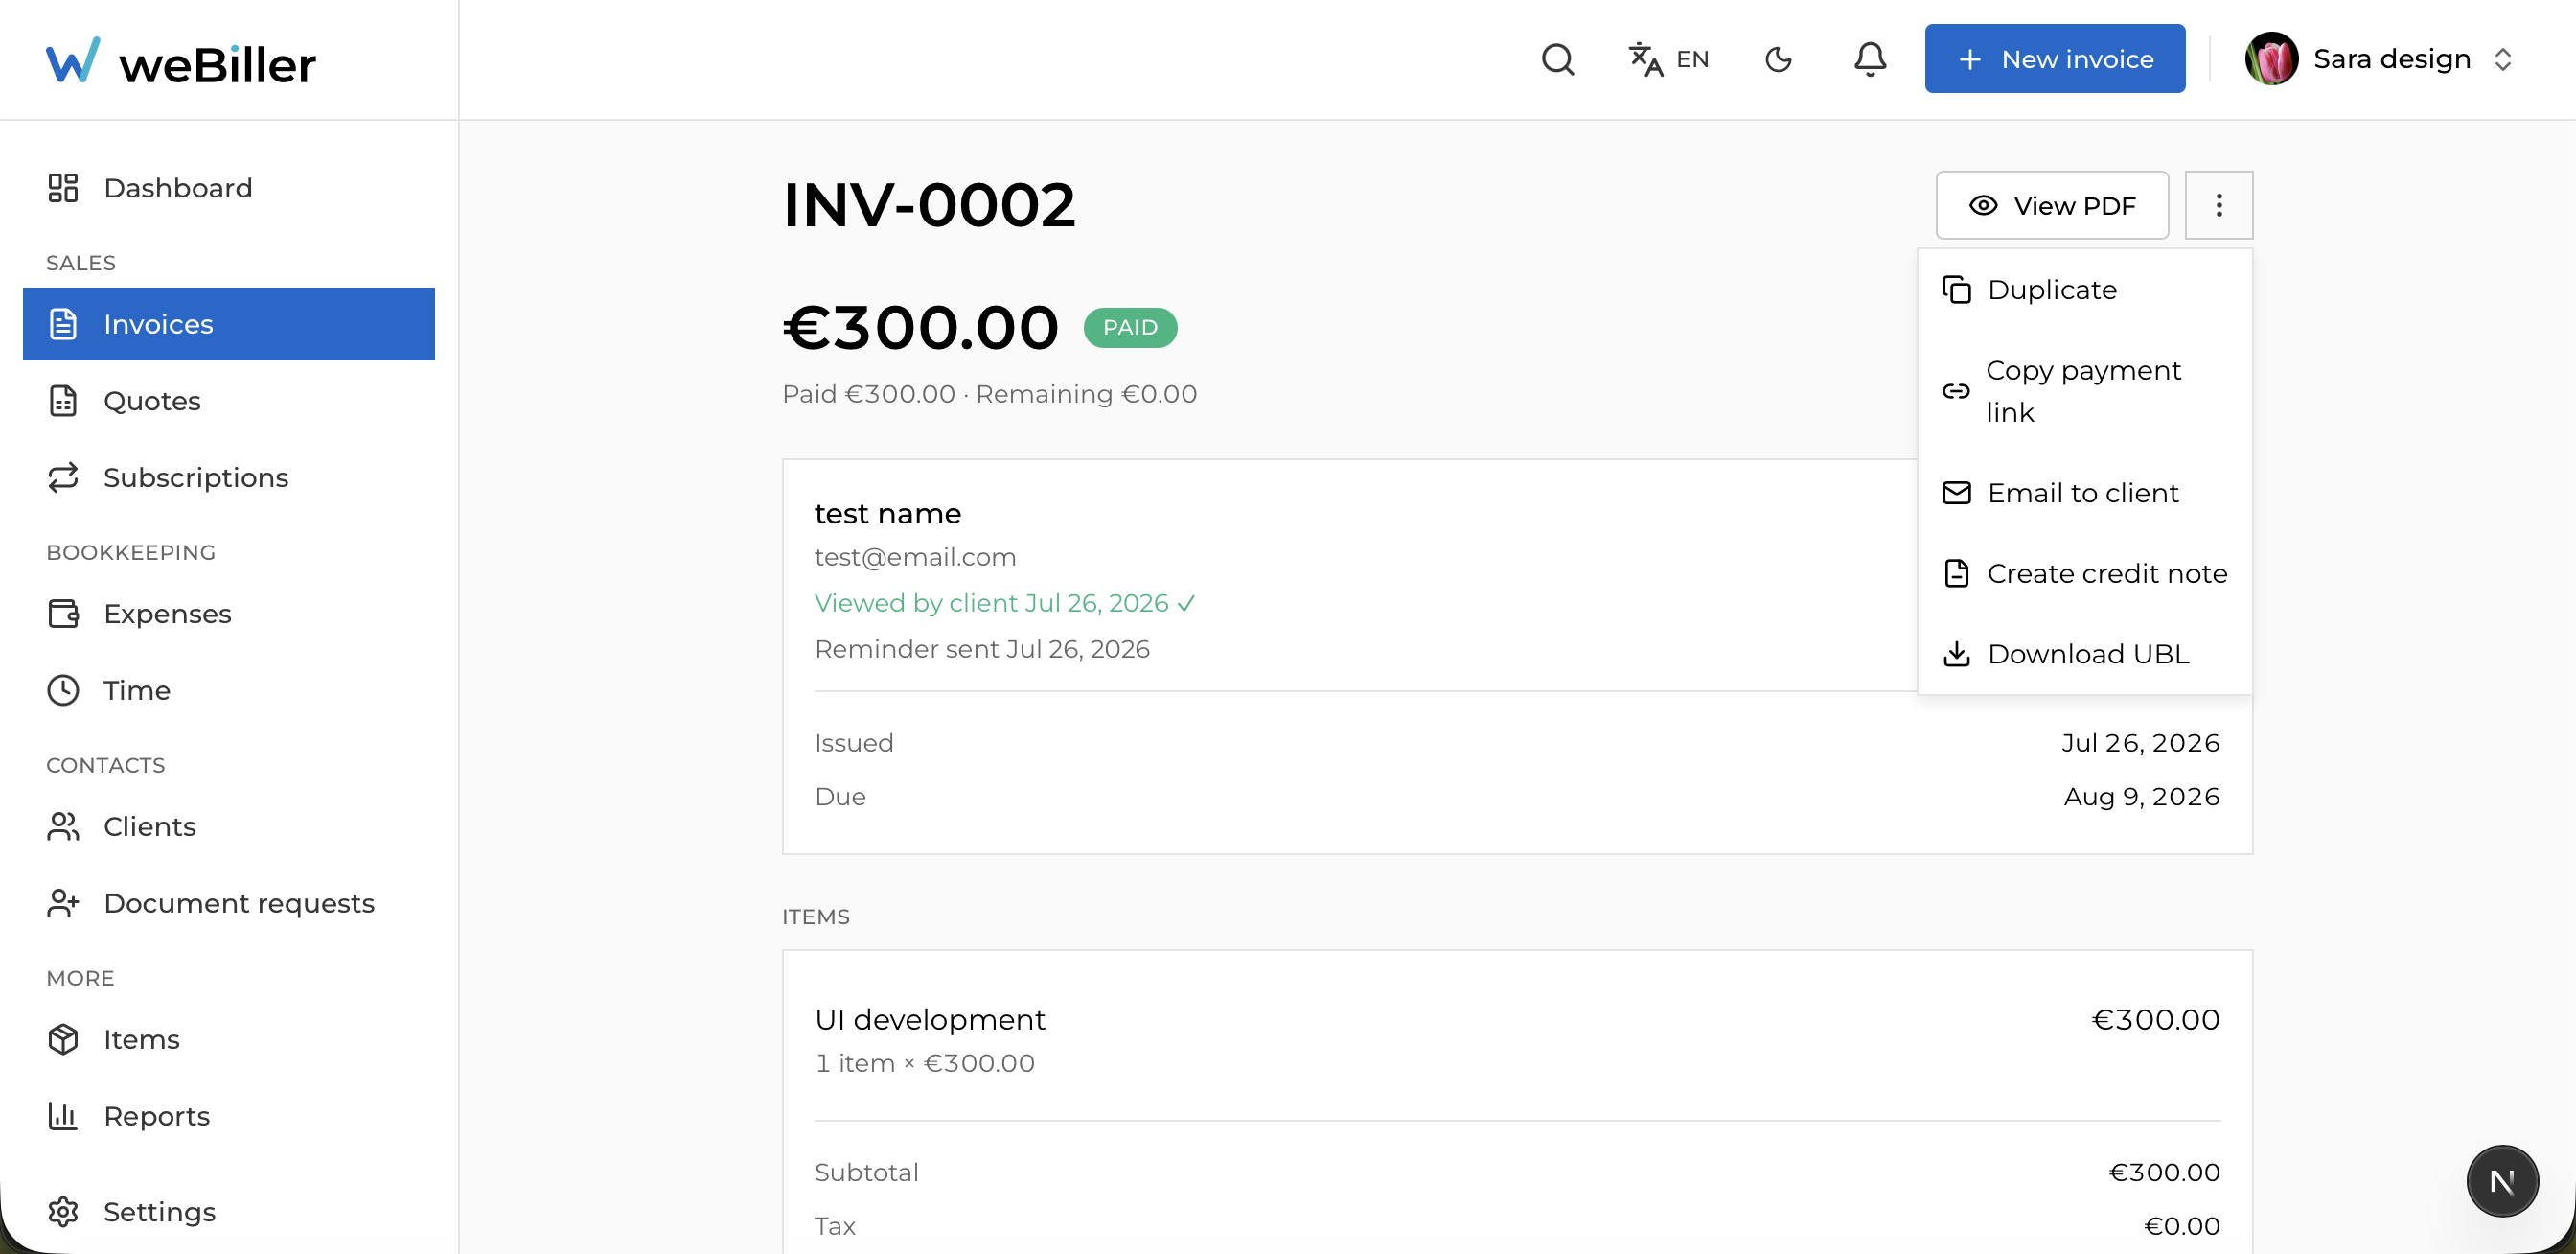
Every invoice has a detail page showing its status, payments, client, and line items, and it’s where you take action.
Header actions
- Record payment: log a full or partial payment (available once the invoice is Sent). See Recording a payment.
- Preview & Send (draft) or View PDF (sent).
The “More” menu (options depend on status)
- Edit: while the invoice isn’t paid, cancelled, or awaiting confirmation.
- Duplicate: copy this invoice into a new draft.
- Copy payment link: mint a secure portal link and copy it to share with a client who isn’t on weBiller.
- Download UBL: the invoice as Peppol-flavoured XML, for clients who won’t take a PDF. See E-invoicing.
- Mark as sent: move a draft to Sent without opening the preview.
- Cancel invoice: for an invoice that no longer applies.
- Delete: only available for drafts.
Recording a payment
Choose “Record payment”
From the invoice detail page.
Enter the amount
It’s pre-filled with the remaining balance; change it for a partial payment.
Set the date and method
Pick the date and a payment method (cash, bank transfer, card, etc.), and add an optional note.
A partial payment moves the invoice to Partially paid; paying the balance moves it to Paid.
If your client reported paying through the in-app exchange or portal, you’ll see a pending payment claim to Confirm or Reject instead. That’s the Awaiting confirmation state, explained in Getting paid.
Reminders and late fees
The detail page also carries a Reminders panel: where this invoice sits on your reminder ladder, any late fees it has accrued, and the full send history. From there you can Pause chasing this invoice, or set up a payment plan. See Reminders & dunning.
A late fee is added to what the client owes; the invoice document and its PDF stay exactly as you sent them.
Attachments
On the detail page you can attach receipts or supporting files (images and PDFs) to an invoice, and remove them later.
Not sure what a status color means? See Invoice statuses.